Secret Southern Couture: Beauty   
Showing posts with label Beauty. Show all posts

Friday, January 3, 2020

Winter Skincare Tips You Don't Want To Forget

Winter Skincare Tips You Don't Want To Forget

Cold weather can take a real toll on your skin. Dry skin can lead to discomfort and, if neglected, can affect your skin's elasticity and trigger outbreaks of irritated skin.

Help keep your skin feeling healthy and hydrated this winter with these tips:

Drink water. Hydrating your body from the inside out plays an important role in keeping skin supple and soft. When you're dehydrated, the body pulls water from any source it can, including your skin. A good rule of thumb is at least 8 cups of water a day.

Hydrate with food. You can also boost your internal water reserves by eating foods rich in water, nutrients, vitamins and beneficial fats and oils. Fish, nuts and avocados all contain plenty of essential nutrients that help promote well-hydrated skin. Foods like cucumber, zucchini, lettuce and watermelon also naturally have a high concentration of water.

Use body lotion. Your skin naturally loses moisture throughout the day through evaporation, but you can help trap the hydration you add from bathing by adding a layer of quality lotion. An option like Remedy Dermatology Series Moisturizing Body Lotion contains a proprietary botanical blend of nutrients, emollients and antioxidants, including green tea, clove and safflower oleosomes. Its smooth, rich formula absorbs quickly, leaving skin feeling soft with no greasy or oily residue. Formulated by skin care experts, the lotion helps skin stay moisturized for up to 24 hours and is free of 80 of the most common allergens that contribute to rashes and skin sensitivity. Learn more at remedyderm.com.

Winter Skincare Tips You Don't Want To Forget

Protect skin. Exposure to harsh weather can quickly dry and chap your skin, so any time you'll be outdoors, especially for extended periods of time, be sure to cover up exposed areas. Keep an extra set of gloves and a scarf in your vehicle so you're prepared for unexpected time outdoors, whether from an accident or impromptu stop at a local park for some fresh air and exercise.

Change out of wet clothes. Always remove wet clothes as soon as possible. Not only do cold, wet clothes affect your body's ability to regulate internal temperature, they can create friction that leads to uncomfortable and painful skin irritation. If getting wet is unavoidable, consider layering your clothing so you can shed wet outer layers quickly before they can soak through.

Use a humidifier. The indoor climate becomes considerably drier in the winter months when the furnace runs regularly. Using a humidifier can help restore a level of humidity that's better for your skin. Aim for humidity levels in the range of 35-50%; depending on your climate, you may need to err on the lower side of the scale to reduce condensation on windows.

Wear sunscreen. Winter sun rays are just as strong as summer rays, even if you don't feel their heat quite as much. In fact, snow burns that result from sun reflecting off the snow can be even more dangerous than regular sunburns. Protect your skin from burning and drying out by using sunscreen with an SPF of at least 15 any time you venture outdoors.

Lotion Do's and Don'ts


Do use lotion, even when your skin doesn't feel dry. Experts say you should apply moisturizer onto damp skin to help lock in any water sitting on the surface before it evaporates.

Don't use too much. Quality moisturizers are highly concentrated and designed to be effective without a thick layer. If you use too much, it's more likely to sit on the surface of your skin, occlude the surface and potentially trigger breakouts.

Do
look for products that match your skin type. While there are common allergens that are present in many lotions, an option like Remedy Dermatology Series Moisturizing Body Lotion is free of parabens, fragrances and aloe that can irritate sensitive skin or allergies.

Thursday, March 14, 2019

Simple Steps to Wake Up Well with This Works

Life balance coach and wellness expert Lauren Zoeller

If you have a hard time falling asleep and waking up and find yourself feeling lethargic during the day, rest assured you’re not alone. Regardless of how hard you may work to try and maintain a healthy lifestyle, you may be in need of a way to reset your body clock for optimal health and to look and feel your best – especially in the morning.

As a life balance coach and wellness expert, Lauren Zoeller constantly urges her clients to prioritize sleep because, according to the Centers for Disease Control and Prevention, one out of three of adults in the United States isn’t getting the recommended seven hours of sleep.

Lack of sleep means lower mental and physical performance and can lead to health issues ranging from diabetes to heart disease. Sleep loss also takes its toll on skin. While asleep, important repair, renewal and detoxification processes take place, which are vital for healthy skin. Dark circles, dehydration, skin redness and sallowness may appear when the skin isn’t able to naturally repair during proper sleep cycles.

According to Zoeller, “sleep” and “wake up” patterns can be reset with a combination of aromatherapy and some simple lifestyle choices.
Simple Steps to Wake Up Well with This Works


“I use a combination of natural, clinically proven skincare solutions from This Works, which work in harmony with your body clock and promote healthy sleep habits,” Zoeller said. “At night, a few pumps of the Deep Sleep Pillow Spray – which is powered by 100 percent essential oils of lavender, chamomile and vetivert – is proven to help you relax and fall asleep faster.

“For the morning, you can try This Works’ Morning Expert collection, which features natural ingredients to rehydrate, protect, smooth and brighten tired morning skin. I love the Wake Up Drops, which are made with peppermint, rosemary and lavandin oil to energize and boost alertness and mental focus.”

Zoeller also recommends these simple lifestyle choices for sleeping and waking up to optimize wellness:
  • Try to go to bed and wake up at the same time (on weekdays andweekends) to keep your circadian rhythms in order, and attempt to keep your bedroom temperature cooler: 60-67 degrees is optimal.
  • At least an hour before bed and an hour after waking, stay off digital devices. The blue light emitted by smartphones and tablets affects melatonin production, which regulates sleep and wake up patterns.
  • Avoid using a loud alarm that jolts you awake, increasing your blood pressure and stress levels. Choose an alarm sound that will gradually take you from deep sleep to wakefulness. Keep a tall glass of water on your bedside table and drink it right when you wake up to combat overnight water loss.
  • Add some morning exercise such as a walk, spin class or yoga and a brief meditation session to help burn off cortisol – the stress hormone – which is most active in the morning. Movement and meditation can help reduce feelings of anxiety going into your day, which helps support productivity.
Find more tips for refreshing your body and mind to wake up feeling well at ThisWorks.com.

Tuesday, June 5, 2018

Healthy Summer Hair Care


While the sun, pool days and warmer temperatures are often a welcome change come summer, they can be brutal on your hair. It’s important to give your locks some extra love this season.

“The sun, sweat and chlorine can fade color fast. Make sure you have the right products to protect your hair,” said Heather Brodzin, director of salon and spa with Beauty Brands. “Whether it’s styling aids, hair protectants, a smoother or moisturizer, make sure you consider your scalp and hair type for a tailored solution. Also don’t forget to schedule a trim with your stylist every 6-8 weeks to keep split ends at bay, or a deep conditioning treatment that gives your hair that extra boost of protection and moisture it needs. A little preparation and regular salon visits can help keep you looking and feeling your best all summer long.”

Find these products and more at BeautyBrands.com/SummerHair, or stop by your local store for hair-styling, inspiration and expert advice to ensure your summer is full of great hair days.

Get Relief from the Heat

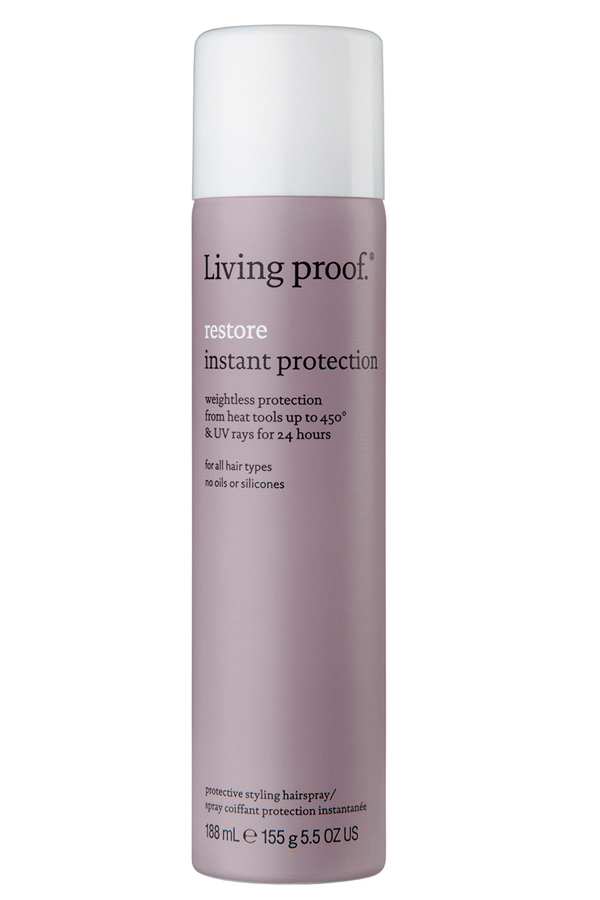
Guard your hair against styling tools as well as summer’s ultraviolet rays and humidity with the 24-hour protection offered by a weightless spray like Living Proof Restore Instant Protection Living Proof Restore Instant Protection. Mist it on before styling and re-apply as needed, or use it as a finishing aid for shine and smoothing.

Extend Your Summer Style

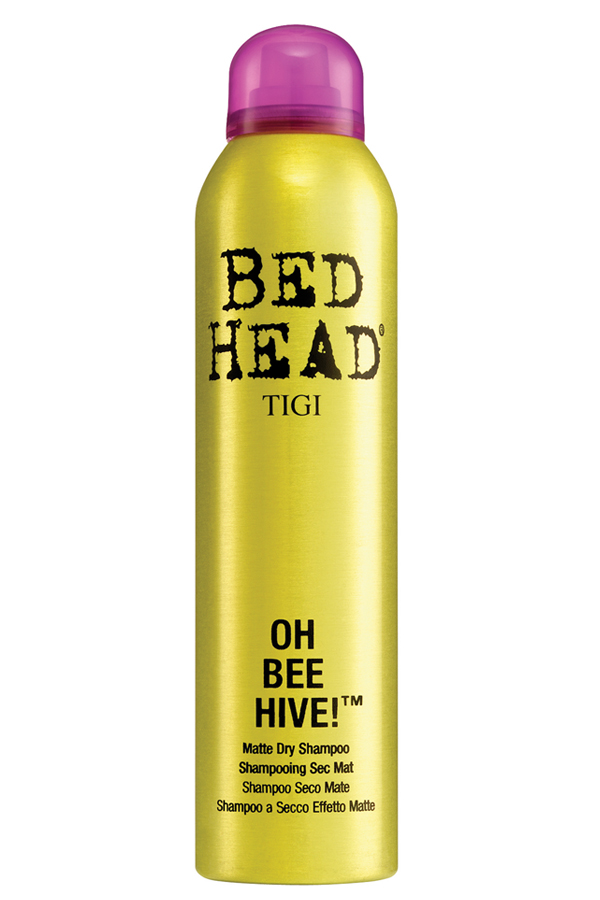
Spend more time outside enjoying the summer sun and less time cooped up indoors styling your hair with dry shampoo like TIGI Bed Head Oh Bee Hive! Matte Dry Shampoo, which creates volume and texture without a lot of work.

Safeguard Your Color

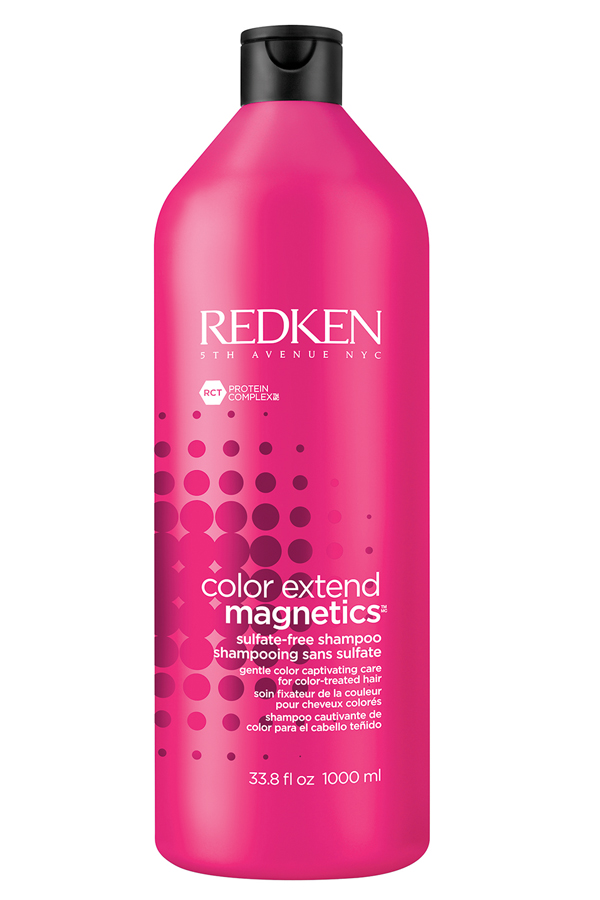
Don’t let the summer sun steal your color. Captivating care can be a breeze with a gentle shampoo like Redken Color Extend Magnetics Sulfate Free Shampoo and Conditioner, which uses amino-ions to build a barrier fortifying color and vibrance.

Shut Down Frizz

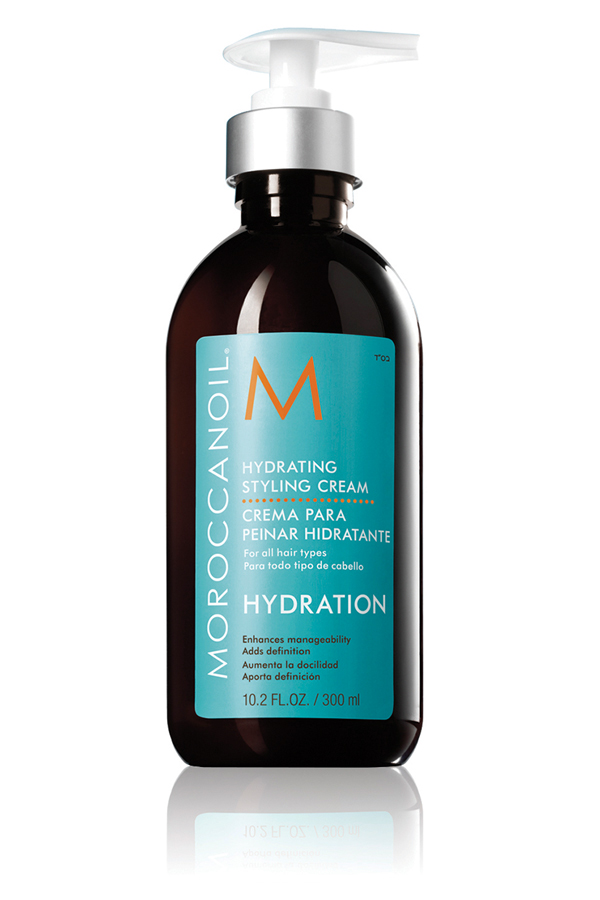
Keep your hair conditioned, hydrated and free of frizz this summer with a styling aid such as Moroccanoil Hydrating Styling Cream. The lightweight formula moisturizes while it tames and helps create soft, natural summer styles.

Lock in Moisture

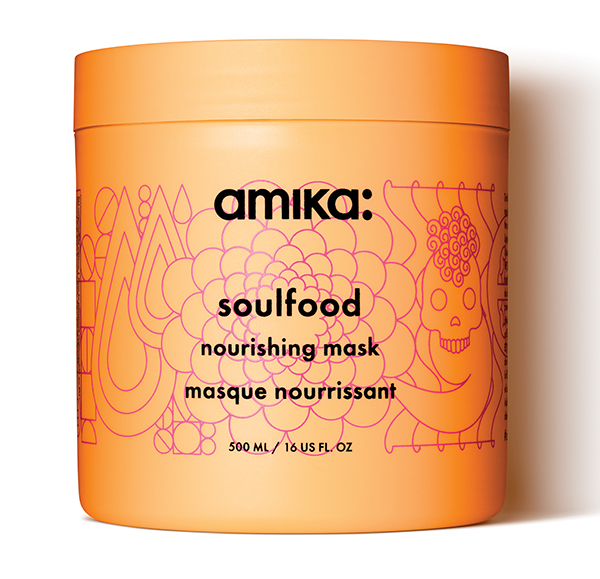
Unlike typical conditioners that rest on the surface of the hair, hair masks work their way into the hair cuticles to repair damage from the inside out. Regular application of a hair mask like Soulfood Nourishing Mask can add shine, increase manageability and provide essential nourishment to seal summer split ends.

Strengthen and Beautify

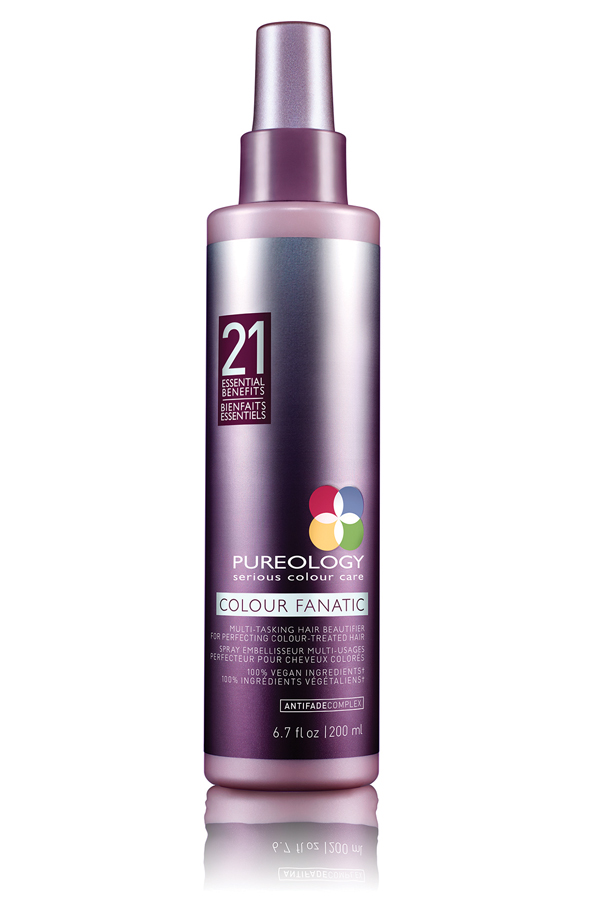
With 21 benefits inside one bottle, including shinier hair, shorter blow-drying time, frizz reduction and enduring hair color, an option like Pureology Colour Fanatic Multi-Tasking Hair Beautifier repairs damaged hair and shields it against heat and environmental damage by sealing hair cuticles.

Monday, February 26, 2018

Tips for Organizing Your Makeup Drawer

Every woman has that one drawer or bin in their bathroom stuffed full of makeup. Organizing Your Makeup Drawer is easy, fun and can make your morning routine so much easier. A few simple tricks, items and reminders will keep your makeup all together for easy access! No more struggle to find the right eye liner, or fear about how old your makeup is. These tips will help you stay on top of your makeup drawer with ease.


Invest In Drawer Organizers: There are tons of makeup organizers out there, but if you use a traditional bathroom drawer to store your makeup, then you know that a simple desk organizer can work wonders. Look for slim trays to hold things like makeup brushes, eyeliner, lip liner and pencils. Find small square containers to house eye shadows and blushes. Foundation, blending sponges, powders and miscellaneous tools can be dropped into shallow boxes or trays as well.

Mark With Date Opened So You Know When To Toss: Keep a permanent marker in your makeup drawer to write the date you open something on the package. This will help you stay on top of when an item should be thrown away. Remember, most makeup products should be thrown away between 6-9 months after opened and first used. This is for your safety. Old makeup can break down and easily cause skin irritation, as well as hold onto germs and bacteria.

Keep Daily Use Products In The Front & Other Items In the Back:
When you begin organizing, keep things like your daily sunscreen, moisturizer, foundation, powder and mascara all near the front for those days when you just add a bit of makeup and run. Items like specialty shadows, eye liners or makeup meant for specific events can be stored closer to the back of your drawer.

The biggest part of organizing your makeup drawer is getting rid of the junk you no longer use or need. Keep like items together, commonly used items in front and specialty items separate in the back of the drawer. As long as you continue to put things back in their place each day, your makeup drawer will stay neat and orderly.

Thursday, January 11, 2018

Eyevage 2018 Review: Should I Try This Product?


How is Eyevage different than other eye creams?

There are plenty of anti-aging creams that are promoted on the internet because it’s a hot market right now. However, not all of the products that are promoted on the internet are effective in delivering its promises to its consumers.

Eyevage is one of the anti-aging eye cream that can be found on the internet. Eyevage reviews are quite positive. This cream is very effective in delivering its promises. It’s effective because it’s formulated by a team of top dermatologists and scientists that are located at Solvaderm.

These dermatologists know the root cause of the problem, which helps them to prepare the product that can deliver the result to the people. This cream is one of the Solvaderm’s products that contain all the important ingredients that can penetrate deep into your skin for improving the microcirculation in the under-eye area.


Why should you own Eyevage?

The signs of aging are really annoying, and the study now says that the signs of aging may start to appear from the mid-20s. As you start growing older, your skin starts to lose its hydration and moisture, which leads to a rougher skin.

Due to the loss of collagen and elastin fiber breakdown, the skin around your eyes loses its elasticity. Because of all this process, the signs of aging start to get visible, such as fine lines, crow’s feet, bags under eyes, and so on.

The skin around your eyes does not have sebaceous glands, which leads to a faster aging process in comparison to other areas of your face. In order to get rid of all these issues, you should consider using Eyevage.

This product is unlike other ordinary products on the market simply because of the fact that a lot of research has been put in by the top dermatologists to get this product out.

The formula is prepared in such a way that your skin absorbs it quickly, which helps in a quicker treatment of your problems. In addition to solving your problems, you can also experience younger and silky smooth feeling in the zone around your eyes after you start using this product.

What does Eyevage claim?

This product claims what it is capable of delivering. According to the manufacturer of this product, here are some of the results that are claimed by the manufacturer of this product.

  • Hydration
  • Ward off free radicals and prevent oxidative stress along with other changes that lead to signs of aging
  • Assist in tightening skin and firming effects
  • Reduce the multiple signs of aging, such as wrinkles, fine lines, crow’s feet
  • Enhances the luminosity, skin’s brightness, and fades discoloration areas.

What are the benefits of Eyevage?

Here are some of the benefits of Eyevage:

  • The ingredients that are used in this product are picked by some of the top dermatologist, which ensures a higher chance of effectiveness.
  • This formula not only quickly treats the annoying signs of aging, but it also softens and brightens the skin around your eyes.
  • The manufacturer offers the 60-day money back guarantee.

What are some of the things to consider while purchasing an eye cream?

Let’s check out some of the things to consider while purchasing an eye cream and compare it with Eyevage.

1. Know your skin type

There are some products that are fit for all the skin types, but it may be better if you choose the product developed for the specific skin type. Find out what skin type you have, whether it is dry, oily, or a normal skin type.

2. Your objectives for purchasing an eye cream

As said in the previous part of the article, there are many skin problems that may be observed under eyes skin. Some of the people may just want an eye cream for a normal purpose, but some may want to purchase an eye cream to solve a specific problem, such as dark circles, crow’s feet, wrinkles, and so on.

Some anti-aging creams are specially designed for solving signs of aging. Try to seek out for research-backed eye creams that contain no. of active ingredients that can treat your problems.

3. Choose the product from the reputed manufacturer

There are many people who just want to sell their products for earning some quick bucks. If you want a quality product, do not just look at the price of the product. Purchase the product from the manufacturer that has a strong brand image.

It’s not an easy job for a manufacturer to create an effective product. A lot of research and experiment I required in order to produce an effective product. And, the strong brands usually spend a lot on research and development.

It’s also very wise to check out the Eyevage reviews on various websites to get an idea of how the cream is helping its customers.

4. Check out the ingredients

There are some ingredients that can impact your skin positively while some others have no impact or negative impacts. It’s very important for a manufacturer to carefully select the ingredients to produce an effective eye cream.

You should do some research on the ingredients that are mentioned on the label.

Closing Thoughts

The fine lines and bags under eyes can ruin your looks in many ways. Eye rejuvenation treatment that is offered by Solvaderm is a stand-out product that can solve the problems of the signs of aging.

The ingredients that are used in this product are carefully chosen by the top dermatologists, which is not in the case of many other anti-aging creams that are found on the market. Furthermore, the manufacturer is so confident about their product that this product has the 60-day money back guarantee for those who are unsatisfied with this product.

Looking at all the reviews and details of this product, we give this product a green signal. This eye cream is one of the best eye creams that I’ve reviewed. You should definitely try this product out for a smooth and soft skin under your eyes.

References:
https://www.thebeautyinsiders.com/how-to-choose-the-eye-cream-that-is-perfect-for-your-eyes.html
https://www.solvaderm.com/

Author Bio:

Kathy Mitchell is a Travel & Beauty Blogger. She likes to Go Out with her Friends, Travel, Swim and Practice Yoga. In her free time, you can find Kathy curled up Reading her Favorite Novel, or Writing in her Journal. To know more about her follow her on Google+, Facebook and Twitter.

Saturday, April 29, 2017

Do You Regret Your Tattoo? One In Six People Do

Why do we get tattoos? Some people put ink on their bodies in honor of someone they hold dear or to signify a specific period of their lives, while others do it because they wanted to look cool while going through their “biker dating” phase or because they got so drunk one night that they felt like it was a good idea to get a “tramp stamp” in the form of a one-legged Tinkerbell riding a winged pig-bear-thing.


In any case, while there are those who know exactly why they have tattoos on their bodies, there are also individuals out there who deeply regret having ink done. Which one are you?

The Stats Don’t Lie

Although having ink under your skin is a fairly common thing nowadays, many people still shun tattooed folk. Still, that’s not as much of a problem as scenarios when one regrets having a tattoo so badly that he or she wants to remove it.

A survey conducted back in 2014 by beauty retailer Escentual.com concluded that four in ten people who have multiple tattoos regret sporting at least one of them, while one in six have so much hate for their tattoos that they would rather undergo laser surgery to have them wiped off than carry them around for the rest of their lives.

If this doesn’t sound intimidating enough, let’s take a look at some examples of celebrities who’ve had a change of heart about their ink.

Boston-born actor Mark Wahlberg didn’t only remove his tattoo, but also made sure his children knew how big of a mistake getting one can be. While speaking to the press during his treatment in 2012, Wahlberg said: “I’ve taken my two older kids to the procedure so they see how painful it is and what I have to go through. I don’t want my kids getting tattoos.” The Hollywood actor took his eldest two children – who were 9 and 6-years-old at the time – to observe the painfulness of getting a tattoo removed.

Another case of a celeb regretting a tattoo involves Swiss model Heidi Klum, who decided to get rid of the ink on her forearm in 2012. She got it four years earlier while she was married to the famous singer Seal, but once they had split, her mind about her tattoo quickly changed.

Fear the Laser

So, what exactly happens when you regret a tattoo so much you want to erase it completely? Well, the most common thing most people go for is the laser removal surgery.

You can’t exactly avoid pain with this process. The only thing that varies is the amount of physical suffering you’ll go through, as it depends on the size and age of the tattoo, as well as the intensity of its color. Most people start seeing changes after the second treatment, but it can take a lot more than that if your ink is particularly strong and old.

Furthermore, The Body Clinic also warns that you may get blisters after the treatment. Yikes! But don’t worry, as they usually go away in a few days, and once they do, the treated skin gets to shine for a few weeks, only to go under the laser again… and again… and again.

Friday, April 28, 2017

7 Ways to Maintain a Young Looking Face

We all want to look as youthful as possible for as long as possible. We spend money on creams, facials, fillers, and even sometimes plastic surgery. To get some tips for how we can maintain a young-looking face, we went to several great beauty professionals including Dr. Kirk Brandow, founder and director of the Brandow Clinic for Cosmetic Surgery in Philadelphia, who has appeared on national programs such as Good Morning America and 20/20. Here’s what they all have to say.


1. Get rest


There absolutely is such a thing as beauty sleep. “Women come to my practice thinking they need an eye-job or a facelift when all they need is sleep. Sleep is a time when we rejuvenate ourselves and cellular turnover is at its height. Getting 7-8 hours of sleep nightly will make a huge difference in how youthful a woman appears especially as she approaches age 30 and collagen production decreases,” says Dr. Brandow. “A woman can speed up aging if they are constantly sleep deprived.”

2. Use an overnight treatment

If you suffer from breakouts or skin dryness leading to wrinkles or blotches, treating your skin concerns at night, is a way to maintain a youthful glow. “Work closely with your dermatologist or aesthetician who can recommend non-irritating skin treatments specifically addressing your concern,” advises Dr. Brandow. You want to take advantage of overnight options available to boost collagen and heal skin while sleeping.

3. Hydrate

When it comes to anti-aging and putting your most youthful face forward, water is key. Water flushes your system of toxins which helps skin to glow. “Women spend a lot of money on topical creams formulated to boost moisture and hydrate the skin yet, if they integrated more water, even 4, 8 ounce glasses per day, they would see fewer wrinkles and an overall smoother younger skin texture within a month,” says Dr. Adriane Pompa, Miami based board certified dermatologist who specializes in aging skin.

4. Be smart about fillers
Fillers are used to add volume that diminishes as we age but people have taken it to extremes. There have been many advancements with fillers over the past 5 years offering more options and more sophisticated ways to administer them to achieve a youthful look.

According to Dr. Brandow, many patients believe that filling their cheeks will soften their laugh lines, so they push doctors to administer two to four syringes in their cheek bones and cheek area at once. This can result in swelling and doesn’t necessarily lift their face. Fillers are often done as an alternative to a face lift but, if not spread out over several weeks, it just gives the patient an unnatural look that distorts their face and makes them look odd.

“My personal preference is to perform the fillers sequentially. For example, I will use one syringe of filler in multiple locations. Then I’ll have patients return in 4-6 weeks and perhaps do another syringe to the same places, or different places, giving them an overall natural look. This leads to a softer, more natural result. The key to doing fillers well are going with small amounts every 4-6 weeks,” explains Dr. Brandow.

5. Get facials

According to Dr. Adriane Pompa, one facial per month does wonders for skin’s clarity, texture, and ability to produce collagen. “There are many at-home facials available one can do weekly. The key is knowing your skin type and ingredients that address your specific skin concern. Also, you can treat different parts of the face differently depending on skin issue. Let’s say you are prone to breakouts on your jawline, have wrinkles on your forehead and dryness on the cheeks, your dermatologist or aesthetician can recommend a facial plan customized for you.”

6. Consider lasers and light!

Lasers are another tool that blasts away acne scars, evidence of past sun damage and evens out skin giving that flawless, youthful glow. There have been so many advancements with lasers resulting in more immediate results without downtime. Lasers typically cost between $600 - $1200 per treatment depending on the city and type of laser. The advantage with lasers is accuracy. You can treat a specific area without affecting the rest of the surrounding skin.

7. Tone down your make-up.

One way to immediately take 10 years off your look is to revamp your make-up. Consider hiring a professional make-up artist who can teach you how to enhance and even modernize your look. New York make-up artist, Carlo Geraci, who was protégé to Trish McEvoy and Kevin Aucion, explains that a lot of women are doing their make-up the same way they did 20 years ago. That bronzer that you loved in the 90’s when you were 24 may appear harsh and outdated at 44. “Heavy eye liner and strong lip colors may only accentuate wrinkles and fine lines. As women age, less is more when it comes to make-up. Opt for a great hydrating foundation or a touch of concealer, a pinch of blush, a swipe of mascara or a gray or brown eyeliner and a natural looking lip liner topped with a tinted hydrating balm,” he suggests.

Friday, April 3, 2015

Pros And Cons Of Different Types Of Foundation

Creams, gels, powders, combination products. Do you know which ones are best for your skin type? Women who aren't heavily involved with keeping up on beauty trends may use the same products for decades before realizing that their skin has changed and what may have worked before just may not work now. Here's what you need to know about the different foundation types so you can make the best decision for your own skin.

BB Cream

Beauty Balms are the craze right now. These were originally created to help restore skin after laser treatments and harsh peels and have since been re-created by most major beauty brands. Most American BB Creams include SPF, although they tend to be more sheer than foreign brands. They give a slight concealing effect, moisturize, and protect the skin. BB creams may need the aid of a separate concealer for acne-prone skin to help touch up red areas. Tinted moisturizers are similar to BB Creams, but usually offer a more sheer coverage. This helps to even the skin tone if it doesn't need much help and leaves a more dewy appearance on your cheeks. BB Cream To Try: Maybelline New York Dream Fresh BB Cream

Powder Foundation

A good application of a powder foundation can look smooth and professional on the skin. It's great for oily skin because it tends to absorb extra oil. Because of that feature along with the very few preservatives that are used in powders, this is a great option for teens just started to use makeup. Powders can be used throughout the day for touch ups with a lot of caking. However, powders can get very messy when you're applying them and can lead to a lot of fallout over your shirt. If you have fine lines or wrinkles, powders can settle around them and emphasize them, making them look deeper.
Powder foundation can come pressed or loose, and in either regular formulas or mineral foundation. Mineral foundation is usually the most organic and natural type, but it's difficult to work with if you're new to it. It can cake around oily areas, leading to uneven pigmentation as the mica collects there. It can also have adverse reactions with skin due to some of the ingredients like bismouth oxychloride (an ingredient that many women look for and avoid in the formula). Powder Foundation To Try: L'oreal True Match Naturale Mineral Foundation

Liquid Foundation

Liquid foundation is usually the go-to for mature skin. Liquid foundations can be full of moisturizing ingredients which is great for handling dry patches. They also come in the most shades, so if you have a unique skin tone, you're more likely to find your match this way. Liquid foundation also has the best coverage outside of having an airbrush foundation applied. Liquids can also help conceal fine lines and enlarged pores. You have to be sure to check the formula of your foundation and make sure it's non-comedogenic (does not clog pores). Some brands can tend to look a little cakey after several hours, so look for one with long wear. Tip: Apply with a moist beauty blender for the best finish. Liquid Foundation To Try: CoverGirl Trublend Liquid Make Up

What's your go-to foundation? Have you thought about trying others?

Monday, December 8, 2014

Julep Snow Crystals Set Giveaway


The holidays are a mix of wonderful feelings, time with people we care about, and a little load of stress while we try to make it all work together (and in time).  We'd like to let one lucky winner take home this nail art and pampering set from Julep.  Julep nail polish is used in a lot of the easy DIY nail art tutorials on MadameAmrose.com and their color catalog is ever-expanding.  Every woman deserves a nice holiday manicure this time of year.  This special "Snow Crystals" set, worth $69, includes:
  • Brilliance Glycolic Hand Scrub
  • "Shenae" nail polish - shimmery pastel mint green
  • "Holly" nail polish - glittery green
  • Crystal Nail File
If you're new to Julep and want to try them out while you're waiting to see if you won, you can get a $58 box of polish and makeup from them for free by using the code TREAT right here.

This giveaway is open to residents of the continental US through December 22, 2014.  Enter using the form below and Good luck!


Disclaimer: The participating bloggers have not been compensated for this post. No purchase is necessary to enter. One entrant per household, per address. Open only to residents of the continental US ages 18+.  Void where prohibited by law. Winner(s) will be contacted by email and have 48 hours to respond before a new winner is chosen. The sponsor(s) will be responsible for product shipment to winner(s) of this sweepstakes. This event is in no way administered, sponsored, or endorsed by, or associated with, Facebook, Twitter, Google, Pinterest, or Youtube. Contact brookedoesitall@gmail.com if you have any additional questions or comments.

Wednesday, November 19, 2014

Five Gifts For A Classy Holiday Hostess

Gifts For A Classy Holiday Hostess


Some women love being the hostess.  It's a great feeling to invite over friends and family for the holidays and watch all of your hard work come together.  It's customary to bring the happy hostess a gift to thank her for that hard work.

A common gift in the US is always a bottle of wine for dinner parties, but that doesn't work for everyone.  Instead, you can offer a beauty-loving hostess a gift she can continue to use long after the party is done.

1. Lip Treatment
Everyone needs great lip balm when it gets cold.  Kiehl's Since 1851 was founded as an apothecary on New York's Lower East Side over 150 years ago, hence the name. Today, their line is popular worldwide for their natural ingredients and effective beauty treatments.  This box includes four lip favorites and comes as a pretty ready-to-gift box set. (Neiman Marcus, $30)

2. Snowflake or Winter Jewelry
I promise not to start singing, "Let It Go" if you do too.  I feel like every year there's a lot of Winter jewelry recycled from the year before.  Look for classy pieces like this snowflake necklace that are good for the entire season, not just one holiday.  As I write this, the particular necklace in the picture is on a web-buster sale.  It's a $100 necklace for only $30. (Macy's. $29.99)

3.  A Warm Scarf
This time of year is when you start replacing all of those really pretty silk scarves with heavier ones to keep warm.  There's no reason why the Winter scarves can't be gorgeous too.  If you're on a budget, a lot of classic scarves are on sale this time of year.  This plaid one only comes in one color, but it's a perfect one for pairing with a neutral sweater.  (Maurices, $16)

4.  A Brooch
I could link to about five other places where I've mentioned how badly I'd like to see this trend come back.  They were very popular from the 1930s through the 1960s and add something very unique to an outfit.  The one featured above has pearls laid into a leaf design for a very classy touch that goes with anything.  (Amazon, $20)

5. Perfume
It's another thing that a woman just can't have enough of.  It's also a gift that you can scale to your budget with ease.  If you don't know your hostess' signature perfume, pick out one that you think matches her personality.  Above is a 1.7 oz. Daisy Dream by Marc Jacobs (Ulta, $76) but you can also go with a less-expensive perfume to suit your needs.

What would you love to receive as a hostess?

Monday, November 17, 2014

5 Trend Hairstyles for Women for Christmas 2014

With Christmas just around the corner many women will already have their appointments booked at the hair salon to make sure they look their best over the festive season.  Between now and then however many will be torn with sticking to their old faithful hairstyle or going for a dramatic new look to go with that amazing dress hanging in the wardrobe waiting for the parties. If you are in this dilemma here is a bit of help as we have done the donkey work for you and found out which are the top 5 on trend hairstyles for this Christmas.


The Textured Bob

We all know the classic bob hairstyle but this offers  a big twist on the original.  The parting is further over to one side that you would normally have and the hair is high and swept over, very Marilyn Monroe.  The hair on the other side is swept back to create an illusion that you have a much longer hairstyle than a bob. With lift and volume created by styling products and flicking sexily over the corner of eye this is glamorous, alluring and one of the top hair styles for this Christmas.

Up Do's

The messed up, romantic up do's from the summer have now been replaced by an altogether sleeker and more sophisticated look.  The hair is dried to give it lift and volume, a must in any hairstyle for this season, and given a mussed up middle parting. The hair is then all pulled back and secured into a bun or ponytail which is then secured in a modern French pleat. Soft tendrils of hair at front fall from each side of the middle parting to frame the face. These should curve outwards with the end flicked in towards the jaw line and shouldn't be curly; no curls allowed in this great style.

The Pixie Cut

Much loved by celebrities, the pixie cut is very short, very textured and very flattering. Which pixie cut you have very much depends on your hair type and its thickness, so have a chat with your hairdresser as to which one will best suit your hair. The back is cut very short and the emphasis is on the length and volume on the top. A short, side parting near the back of the head has one side feather cut around the ear and on the other side the longer, textured hair falling forward. The full on pixie look has one eye obscured by the hair while other have shorter strands acting as a fringe. One of the top hairstyles of the year shows no sign of abating, and is one of the most requested in the run up to Christmas.

Plum Crop

According to the experts at Salon Lines this is a good one for anyone who doesn't wants a new look for Christmas without a drastic haircut. This is basically any kind of cropped hair cut but coloured a deep, warm plum colour. There is nothing like a change of colour for completely changing a look without getting up close and personal with scissors.

Dip Dyed Fringed Bob


A longer bob with a full fringe is one of the most bang on trend hairstyles  of the moment, and having the ends dip dyed a lighter colour is a wonderful look for this Christmas season.  This is a lot more subtle and flattering look than the block black and blond and red and black trends which have come and gone in recent times. A soft brown with lighter, sand coloured ends is a particular favourite but you can adapt it to suit whichever main colour your hair is. 

Wednesday, October 8, 2014

Fall Beauty Giveaway


Fall Beauty Sweepstakes - Hosted by Madame Amrose

The leaves are changing, and so are some of the things in my daily makeup routine.  I put away the neon polish in favor of richer colors and broke out the glitter polish. On my lips, it's time for dark stains.

In Fall, it's the best time to indulge in richer colors.  These new hydrating lip crayons from Julep come in an array of Fall colors, but so far they've been selling out quickly after they re-stock.  Mavens received a lip crayon along with their nail polish in September.  If you're not a Julep Maven, you can try out your first box for free by using the code FREEFALL right here.

 We're going to give away one plush pout lip crayon in magenta plum and a nail polish in deep red (Mary Lee)!  One lucky reader is going to receive both!  The giveaway is open to the continental US through October 22, 2014.  Enter using the form below and good luck!

Bloggers participating are not responsible for prize fulfillment.  Winner will be notified via email to the address provided on the giveaway form and will have 48 hours to respond and claim their prize.  If you would like to see your company featured in a group giveaway like this one, contact Brooke at brookedoesitall@gmail.com

Thursday, September 25, 2014

10 Bridal Makeup Tips That Ensure You’ll Look Great At Your Wedding

Every woman wants to feel and look great during her wedding day. Aside from the various event preparations, soon-to-be brides also have to choose the perfect gown, shoes, accessories, hairstyle, and of course, the makeup. Among all these, it’s usually the makeup that could make or break the bride’s gorgeous appearance. Here are 10 of the best tips which will ensure that you’ll look great on your wedding day:

  1. Pick the best makeup artist if you choose someone else to do it for you
Unless you have the knowledge and confidence to do your own makeup on your wedding day, it is ideal to seek the help of a professional makeup artist. This would help reduce stress and burden on that special day. Most professionals often bundle hair styling and doing the makeup on a single contract making it more cost effective. And when searching, ensure to pick the best by asking for recommendations or checking the artists’ portfolios.

  1. Experiment and practice in advance
When you choose to do your own makeup, it is recommended to experiment and do some practice applications in advance. This is to ensure precise and quicker application on the wedding day itself plus, you will be able to notice any needed change or improvement early on.

  1. Prepare your face and skin
The most important thing to prepare is not really your makeup, but it’s actually your face particularly your skin. Try to enhance your skin tone several weeks before the wedding, ensure that you are well-rested before the wedding day, and your face cleaned and pampered before putting on your makeup.

  1. Choose waterproof makeup
Waterproof makeup is essential to prepare for those teary moments and for the unpredictable weather.

  1. Use a primer and foundation
The two most basic and important cosmetics you should apply are primer and foundation. The primer helps ensure a smoother and longer lasting bridal makeup while the foundation ensures natural blend and of course, show your beauty.

  1. Hide imperfections with concealers
If you have skin problems and imperfections like blemishes, facial marks, etc, you can hide them all using the different types of concealers. Apply concealers only after applying your foundation.

  1. Choose to highlight either your eyes or lips
There are two facial assets you can choose to highlight, either your eyes or lips. And you only need to choose one to avoid an awkward or clown-like appearance. Experts usually choose highlighting the eyes.

  1. Avoid too much powder and don’t use glittery or sparkly makeup
If you don’t want to feel and look greasy afterwards, be light on using powder. Additionally, avoid using glittery and sparkly makeup because they can negatively affect your looks on photos.

  1. Try to photograph your test makeup
When experimenting and preparing your makeup, it would be best to take and see what you will look like in photos. Although you can see yourself on the mirror, photos usually produce different results.

  1. And be ready for the day’s touch up

And although the makeup you have used during the ceremony can last throughout the day, it is still advised to have a small makeup kit just to prepare for emergency or those needed touch ups.

Thursday, September 18, 2014

5 Tips for Better and Healthier Looking Skin

Your skin is your most important organ, from a visual perspective anyhow. And like all of our organs the way we treat it shows.

No matter how much we care about our skin, there’s always room to improve on it and we've compiled a number of great tips to help you do so.

Skin Type

Knowing the sort of skin that you have is a big help when it comes to understanding how to deal with it and give it the best care. Dry skins need a very different approach to mixed or oily skin and it’s also worth remembering that your skin varies from season to season too. So, be aware of this as it will help you ensure that you take care of it in the best possible manner no matter how it changes. Skincare by Alana is a good website for tips on skin types and also care.

Scrubs

Different scrubs and exfoliate will have different impacts on different skin. There is no such thing as one for all skin and so you need to test and try and inform yourself as best as possible in this regard. Consult with a dermatologist for the best possible results.

Sun Cream

A very important part of your skin process. SPF sun creams or moisturizers are one of the mainstays of healthy skin. Of course, it’s not just the summer time that you should be wearing them either. SPF creams should be worn during the winter as well as the summer – there are still sun rays in gloomy weather. In fact, the sun is often harsher on the skin in this sort of weather as the clouds amplify the amount of light that damages skin that comes through to the skin. Oil free and powder sun screens are a good option.

Water

Water is one of the most important parts of good skin and one that a lot of people don’t get enough of. Water helps cleanse the skin and will rejuvenate it. No matter how many times people are told that they need to drink 2 liters of water at least a day, they still don’t. Frankly, it’s a big issue for skin and without it you will be pushing against the grain.

Cleansing

A very important factor too. Cleansing properly will help get rid of all the oil, dirt and makeup that gathers in the powers throughout the day. Cleansing twice a day will help lift a large amount of this and one of the best tools for the job is the Clarisonic as it keeps skin clear and prevents problems.

It Takes Time

Skin doesn't just improve over night, however if you have some patience you will see results. One of the biggest reasons people don’t see improvements in skin is down to the fact they don’t have the patience to continue these changes. If you do, you will most likely see better skin, but give it up to two months.

Great skin is a fantastic thing and can make your whole appearance a lot more attractive. These tips will help ensure that you have a clear, bright appearance.

Friday, September 5, 2014

Top 5 Best 1 inch curling iron

It is a tricky job to choose the right curling iron from a host of options available in the market. It is really a challenge to know which one is safe for your hair you to choose the perfect among the curling iron sizes. You do not need to worry further as this list of top5 Best Curling iron will guide you in choosing the best from the shelve. This list is made after an extensive research by testing all the leading curl irons available in the market. Priority is given to the ones which are affordable yet rich in features.

#5. Infiniti You - ideal for beachy waves
This curling iron is unique for its no-clamp design. This sleek looking iron allows you to freely wind your hair all-round the barrel without the nagging crimps caused by the standard clamp irons. This elegant product comes with specially made heat-resistant glove for comfortable curling. This product comes to you at a highly affordable price tag of $25 or below.

#4. Conair 1 inch Spring Curl
This curling iron allows you to create soft and sexy curls for that perfect hairdo at a party. This is a specially made iron that emits ions resulting to zero frizz while in use. Conair 1 inch iron comes with 25 heat preset. You can change the heat settings as per your requirement for that perfect finishing. Conair Spring Curl is the Best Curling iron made of ceramic that helps in penetrating heat faster than other curling ion.

#3. Beachwaver – the third Best Curling iron
It is for those who love beachy waves. This iron comes with a rotating barrel. The barrel does most of the job for you as you glide the iron through your hair. You just need to keep your hair rotate along with the barrel and slowly come down to the scalp. This is a hair curling method that is the easiest and can be done by anyone without prior experience. Buying this ion will enable you to sport any type of curly hair style without taking any assistance from a professional hair style. This product is still on the top of the charts for its ultra-stylish design and superior functionality.

#2. Conair Spiral Styler
If you have that special corkscrew curl, do not feel left behind in styling. There is one special product for you. The Conair Spiral Styler with instant heating feature works both on long and short hair. This curling iron comes with a turbo heat function that gives instant boost of heat for those difficult curling areas. This is a very handy device that comes at a unbelievable price tag of $20. Do you need more reasons?

#1. Hot Tools Iron – curl like a pro
This is the Best Curling iron recommended by professionals. This product is on the top of the list in this category for several years for its superior functionalities and recommendation by leading style magazines and expert hair stylers. If you want a professional finishing in your curly hairdo, this one is the best choice available for you. This iron comes with a heat toggling gauge for fine setting the heat level while doing the curls. You can own this one for as low as $30.


You need to make sure that you know the difference between curling iron vs curling wand.

Tuesday, September 2, 2014

Lace Veil Inspired Nail Art Tutorial


This look is inspired by the lace edges of some bridal veils. With a steady hand, this should take about 15-20 minutes total to complete.

Colors Used


  • Julep's Colette (Dark Purple)
  • Julep's Bunny

Tools Used


  • Tiny paint brush
  • Small dotting tool
  • Tiny dotting tool
  • Base Coat
  • Top Coat
  • Optional: Rhinestones and Pearls


Difficulty - Medium

Clean your nails with non-acetone nail polish remover or rubbing alcohol to remove any excess oil or debris.  Apply your base coat and a layer of Colette (dark purple).  If there's any on the skin, take a q-tip or extra brush dipped in polish removed to clean up the edges while you wait for this purple layer to dry.  It should no longer be tacky before you move on.

Apply a thin layer of top coat before doing the design.  This helps to prevent smearing at the end.

The Lace

Draw a half circle across the base of the nail sectioning off how much of the nail you want to be lace.  Use a tiny brush dipped in Bunny (white) for this.  For short to medium nails you can start right at the cuticle.  For longer nails, you can start this as far up the nail as you want.


Again with white and the same brush as before, begin drawing lines in a criss-cross pattern going from the base of the nail up to the circle.  If it goes over the circle a tiny bit, don't panic.  This will be covered.  Try to get all of the lines the same width by using the same amount of pressure.

If the lines are proving difficult, you can create the pattern with striping tape and cut it to fit the space.


Take a dotting tool dipped in white to create the bubbled border around the half-circle.  You want each dot to touch on the sides and to not cross over the inner edge of the line.


With a smaller dotting tool, place tiny purple dots into each of the white ones you just created.  Leave a white border on every side of the purple and try to keep that border the same between each one.


Finish this off with your top coat.

Optional:

To make this like the version in the first photo- At the base of each lace section, I placed one rhinestone and two pearl decorations.  To do this, give the nails another layer of top coat and gently place each decoration into it while it's still wet.  Let it dry and they'll be secured into the top coat.

Thursday, August 21, 2014

Easy and Natural Beauty Makeup Tips

Long ago when we’re loving to get doll up and put lots of colors on the face,nowadays going au naturelle is the right way for our daily activities. And it’s not that difficult to do! Read on how you can look perfectly yet natural with these easy natural makeup tips for all skin tones.

There’s nothing worse than getting caked-up for the whole makeup. It looks fake and as if you’re trying too hard to impress someone. Trust me, you’ll look better looking natural and you’ll wonder why you spend so much time getting ready dolling up. Yep, less is more is the epitome of true beauty.


How to do a perfect, natural makeup look, step by step

Begin the process by perfecting your skin. Wash with the right cleanser, exfoliate gently once a week, and have a healthy diet to keep skin youthful and supple. A glowing skin radiate from within will make your whole look even better. Tips: take GLA supplements regularly to improve and strengthen skin, just like in your younger years.

The next key is to moisturize regularly. Apart from  keeping your skin moisturized, hydrated and looking plump, a moisturized skin will also help the makeup products adhere better to the skin, you will use less of the product, and the whole natural makeup lasts longer.

Cover unsightly imperfections and using good concealer. Never get heavy-handed or it looks obvious on the skin. And of course,use only where it’s necessary and  blend well.

The next is of course, a foundation. Despite what you might think, you only need to apply to smooth out the skin and even out the tone such as to cover redness and pigmentations. Again, blend well and down towards jawbone. Choose shades exactly the same as your skin tone. If not, go a bit darker to be safe (lighter ones can make you look fake and patchy).

Tip: for daily, casual look, consider using BB cream – formulated to have a foundation, sunscreen, and moisturizer in one go, and gives of natural and dewy looking skin.

Going natural doesn't mean you need to skip a blusher! The trick is to choose suitable to your skin tone and use ever-so-subtly that it looks like you have young and natural red cheeks. In general, candy pinks work well for fair skin, peachy pinks for medium, while brownish/mauve pinks for darker skin. Apply on the apple of the cheeks and blend outward.

Natural looking lips call for lip tint rather than super creamy, super matte for lipsticks for natural makeup. Choose a good lip tint that creates a soft and satiny looking lips.

I bet after reading this you’ll be tempted to try out natural makeup for your own, I do too. Try out and see for yourself how looking natural is quicker and looks way better while I’m off to create a natural makeup look for myself. 

Tuesday, July 29, 2014

DIY: Five tips for dying your hair at home

Hair salons are known to be expensive – especially if you have long or thick hair. So much so, that you feel like you go in asking for a colour, and come out with a second mortgage on your home. If that’s how you feel, then you’ve probably walked down the hair dye aisles at the grocery store and wished you knew how to do it yourself. Good news – it’s a whole lot simpler than you’d think! Here are some tips for dying your hair at home!

Set up a space

This might seem like an obvious thing, but you’d be surprised at how important this step is. If you don’t have enough bench space, you can get yourself all muddled up in regards to the actual dying. When you’ve got to put treatments, toners and the dye in (and yes it must be in a specific order), you don’t want to be getting confused at which one is which! Besides, if you don’t get a good working area with enough room to do it, you’ll end up with dye everywhere – and that is so not fun to clean up.

Ensure that the hair colour will suit you

If you regularly get your hair dyed at the salon, your hairdresser will usually let you know if you are making a big mistake in regards to trying an outlandish colour. When you are at home, you forego this luxury. So before you buy you’re desired colour, triple check by asking friends, family and looking online that this truly is the right colour for you.

Use Foam/Mousse Products

The hair dying experience can be very messy, and normal hair dye doesn’t make it any easier. If you tend to make a mess easily, perhaps try looking out for the products that foam up and feel like mousse. Aside from the easy clean up, they spread on a lot easier, which means you won’t miss a spot!

Don’t Wash Your Hair Beforehand

The most common mistake many home hair-dyers make is washing their hair before applying the dye. Applying chemicals to freshly washed hair will severely strip the hair of natural oils, causing brittleness and breakages. You’ll likely need to put at least three treatments through in order to put a slight amount of moisture back into your hair. If your tresses are really that dirty, be sure to wash it at least a day before in order for the natural oils to build up again.

Read the instructions

This is the most important tip in the whole lot – it cannot be stressed enough how imperative it is to read and follow the instructions word for word. Every hair dye product you buy will have very clear and easy instructions to follow – if you do so, you can’t go wrong! There are major risks involved in dying hair, such as hair loss or hair breakage so ensure you’re absolutely careful while doing it. If hair loss is something you are worried about, click here for more information on how to improve it.

It seems like a stressful idea to dye your own hair when you’ve trusted a trained hairdresser to do it for so long – but once you realise how easy it is to do, and how much money you’ll save, you’ll never look back!

Tuesday, July 30, 2013

SESHA Skin Envy Instagram Contest


Calling all Instagram fans! Who gives you skin envy? SESHA Skin Therapy wants to see your photos of women who have flawless complexions. The picture can be of a friend, family member, celebrity or even one of you! By simply following the guidelines below, you will enter to win TWO, full-sized SESHA Clinical products. Joining the SESHA Skin Envy Contest is easy:

  • STEP 1: To enter, follow SESHA on instagram, @SESHASkin.

  • STEP 2: Instagram a picture of a woman who you believe has flawless skin with the hashtag #SESHASkinEnvy and tag @SESHASkin. The best photos win! There will be THREE winners in total.

SESHA Skin Envy Contest on Instagram

Start Date:  Monday, August 5th

Winner Selection Date: Friday, August 9th